



The Replica System
01Where it starts
Replica Stands
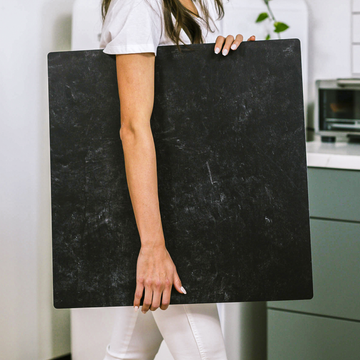
The Replica System starts with using Replica Stands to connect any two Surfaces to create a wall/table effect.
Replica Stands come free when you order any two Surfaces. A complete L-shape setup comes together in under 15 seconds. Oh and we invented these. Our Stands are the original and still the best way to hold backdrops together.
As your skills develop, add tools that control light and create professional-level effects. Each light tool solves a different lighting problem and clips onto your setup using Replica Stands.


Because it's modular, choose only the tools that solve the problems you have. Or keep it simple and collect more Surfaces instead ;)
Let's meet each tool...
02Brighten or darken
Light Modifier
The Light Modifier brightens or darkens your scene. Replica Stands hold the Light Modifier in place like this.


03Soften the light
Diffuser
The Diffuser softens your light and controls shadows. This is how to hold your Diffuser using Replica Stands. Make sure the Diffuser is between your light source and scene:

This is the dramatic difference the Diffuser makes. See how much softer the shadows are when you use the Diffuser? Shadows are now under your control!

04For metal and glass
Reflection Blocker
The Reflection Blocker blocks reflections in shiny objects, vital if you photograph reflective objects like metal and glass. Replica Stands hold the Reflection Blocker in place like this:

There are two openings in the Reflection Blocker: a smaller square opening for phone lenses, and a larger circular opening for DSLR lenses.


The white side reflects white/light tone onto the front of your reflective object. The black side reflects black/dark tone onto the front of your reflective object.

Add the Light Modifier to block reflections from the side of your room. In this setup, the Diffuser blocks them from one side, the Light Modifier blocks them from the other, and the Reflection Blocker blocks them centrally.

05The full system
Putting It All Together
Here's how every tool improves the final photo.

This is what the full system looks like:
Replica Stands hold your system in place. The Diffuser softens the light coming through your window. The white side of the Light Modifier bounces light to brighten your scene, while the black side absorbs light to darken your scene. The Light Modifier also blocks reflections from the side of your room. The Reflection Blocker is the final piece, vital if you photograph reflective objects like metal and glass. All tools are sold separately so you can create your system based on your needs.

Now you know how the Replica system comes together. Ready to create some incredible photos?
Shop06Every angle
Replica Riser
Here's how the Replica Riser showcases your products without stealing the spotlight.
The Replica Riser can be positioned and photographed at multiple angles to create abundant content of every product you sell.
The three most useful angles for product photos are eye level, flat lay, and 45 degrees. Let's see how the Riser works for all three:
Angle 1
Eye level photos
Eye level photos are excellent for products with side detail and minimal top detail. For eye level photos, the Riser can be placed on its base or side. Base placement creates a platform like this:


Angle 2
Flat lay photos
Flat lay photos are best for products that have most detail on top, with minimal detail on the side. You can also lay tall products on their side to take advantage of the flat lay angle.


Angle 3
45 degree photos
Choose a 45 degree angle for products with detail on the top AND side.


Everything we make works together as a system so you can start with everything you want now or grow your system as your skills grow. We're here for you no matter what.
Shop