


Guest author Heather Templeton of Heather's Home Bakery
Long-time baker, self-taught food stylist/photographer, and Disneyland superfan. Heather's photography style is light, bright, and chock full of sweets.
Picture this scene: You’ve baked a beautiful dessert. It’s styled to perfection. Your camera is out. You snap that first photo…and your heart starts to sink. The image is dark…and it isn’t crisp. So you do your best to brighten it up in post-production, but the end result is grainy.
This is an all too familiar scene for many of us.
I’ve discovered some simple keys to mastering bright, crisp images every single time I shoot. I’m here to break them down into four, easy-to-follow steps that will take your images from flat to WOW. If you use a DSLR camera, all four steps apply to you. If you use an iPhone, skip the step about camera settings and use portrait mode for eye level photos. Mandy talks all about portrait mode here.
Lighting
Arguably THE most important element in photography, lighting can make or break your photos.
Here, I’m going to focus on natural light since that’s what I use. If you don’t have good natural light, shoot at night, or just don’t want to think about how natural light changes, Mandy has a great how-to on artificial lighting basics here.

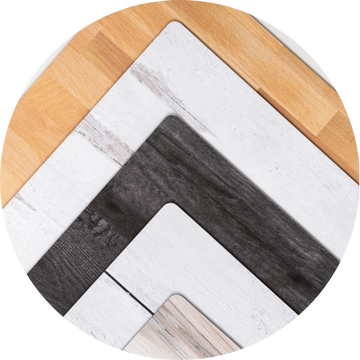
Backdrop positioning
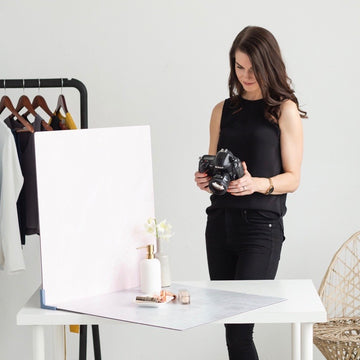
I begin by setting up my Surfaces at a 45-degree angle toward my kitchen window. This allows me to shoot at multiple different angles without shadowing my scene with my body. If you take all your photos from the front, you don’t have to worry about your body casting shadows so you could also place your Surfaces parallel to the window (read: with the window along the left or right side) rather than at a 45-degree angle. To discover which orientation is best for you, take photos in both orientations (45 degree and parallel to the window) and see where you prefer the shadows to land.
Note that my window has a sheer curtain over it. This diffuses the light so that I end up with soft shadows rather than hard ones.

Time of day
I’m fortunate to have excellent natural light flooding my kitchen from late morning until late afternoon. As the time of year changes, though, so does my optimal time of day to shoot. To find your optimal times of day, set up a simple scene next to your best window and take a photo from the same angle every hour from early morning until late afternoon. Edit each one (more on editing below) and see which photos your eye prefers. Those are your optimal times! As the year progresses, you may notice a change in how your photos look even though you keep shooting at the same time of day. Whenever that happens, do the photo-every-hour thing to see if your optimal times have changed.
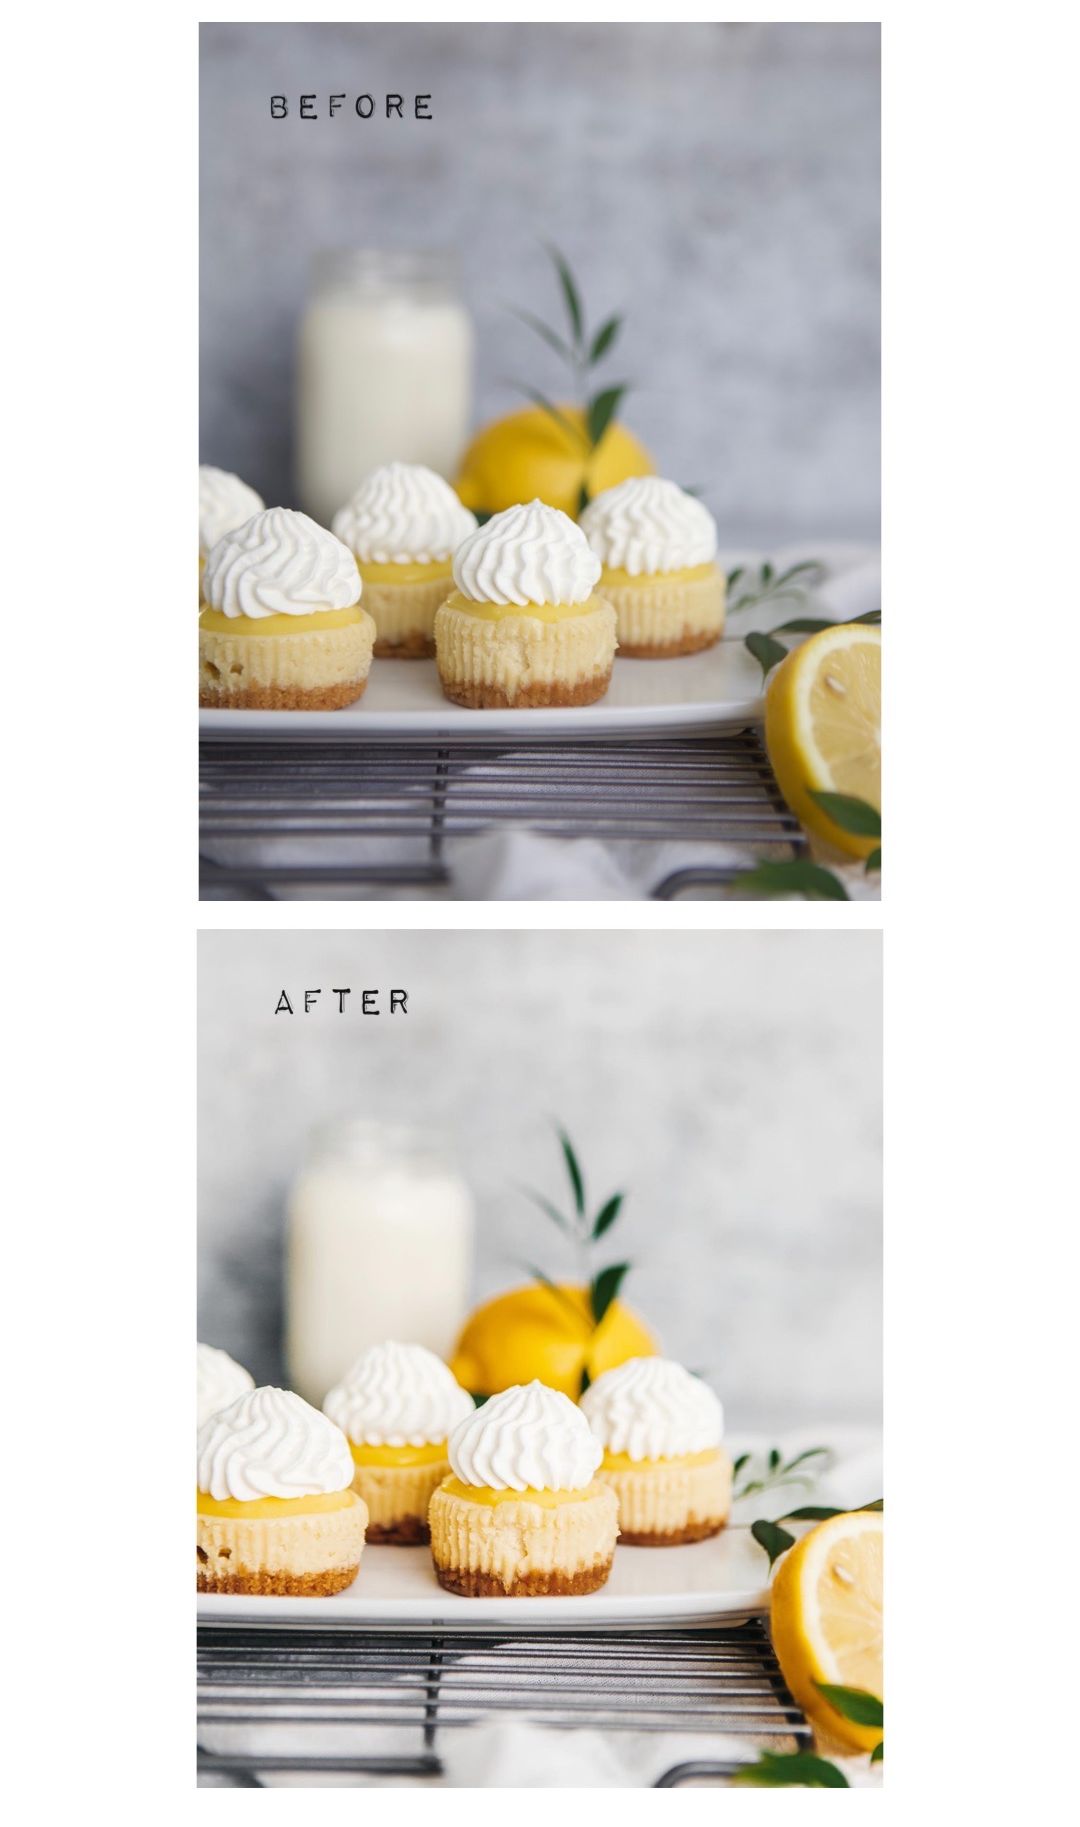
If your photos still look darker than you want them too, that's ok! You're going to brighten them up in editing. I actually shoot on the darker side (read: underexpose my photos) so that I have lots of room to tweak them in editing. If you overexpose your photos by letting in too much light when you shoot, you won't have any data there when you go to edit. The photos below show the "before" photo that I took in my super bright kitchen and what I ended up with after editing. So don't worry one bit if your before photo looks like mine!
Best practice: keep an eye on the sun, and the warmth that your natural light lets in. Find the brightest spot in your home or studio and shoot at the same time of day for max consistency in your photos. Use a diffuser (like my sheer curtains) to soften your light.
For more on natural light (including the difference between hard and soft light and a step-by-step setup), check out Mandy’s natural light how-to here.
Composition
This leads us right into one of the most fun elements of food photography (in my opinion!): the composition.
Setting up the shot. Taking what you’ve made and creating a scene. This is where your creative juices get flowing. There are so many elements to this process from texture to contrast, and color to foreground and background. To begin, find your story. What are you trying to convey to your audience?
Are you drizzling gooey caramel onto a warm, fresh baked brownie? Are you showcasing a beautiful Bundt cake with contrasting glaze and a sprinkling of powdered sugar? I would imagine that you can quite clearly conjure up these images in your mind as you read…and I’m guessing you’re getting hungry! ;)
Painting a word picture is important, but painting an ACTUAL picture with the foods and desserts that you have created can and will be impactful with the right composition. You want your audience to FEEL the image, and have it come alive for them. You want them to emotionally connect with it, because when this happens, they have emotionally connected with YOU.

Here's an example of a simple but really effective composition for baked goods. For these mini cheesecakes, I wanted to play up my whites and the beautiful lemon yellow of both the fruit and the curd on top of the cakes. I began with a simple white flour sack towel (which can be purchased in a 5-pack anywhere for a very low cost). Second, I added another dimension to the base by adding a cooling rack on top of it, just before the third step of placing my plate of mini cheesecakes down on top of it. Step four was rounding it all out and finalizing details. I wanted to add in some greenery for an organic look, as it pairs really well with yellow and white. I also added some milk! Why? Because I love milk with anything creamy. I'm using my Concrete Surface on top and my Cement Surface on the bottom, by the way.

The key to this composition is placing your objects in a diagonal line from back to front, with your taller object (the milk bottle) in the back left corner, your subject (the plate of cheesecakes) in the middle, and the shorter object (the lemon slice) in the front right corner.
The composition looks pretty basic when when shot from above but full of depth in the final eye level shot. In the final shot, the height of the milk bottle balances out the shorter lemon and cheesecakes with a nice stair-step effect. Note that by placing the milk bottle all the way in back and the lemon slice all the way in the front, we keep them (purposely) out of focus in the final photo. We'll talk about how to keep things out of focus below.

I encourage you to experiment and find your style. Is it minimalistic with a strong main subject and message? Or is it detailed down to the last drizzle and spoon strategically placed in the foreground? There is no right or wrong answer here. You have a style and eye for detail that is uniquely your own, so USE IT.
Best practice: Try placing small objects in the foreground and tall objects in the background to create a fuller scene. Play with the diagonal composition. Be inspired by others, but create unique images that are all your own. This will soon become your trademark.
Camera settings
The classic question “what settings did you use to shoot that photo?” is a good one but also a loaded one! Using someone else’s camera settings and seeing what happens to your own photos is one of the best ways to learn, but it’s important to understand why those settings created that photo you loved. Your light and shooting environment will undoubtedly be different than the ones that created that photo, so you’ll probably have to tweak your settings to recreate the look. Understanding the interplay between aperture, ISO, and shutter speed will help you make those tweaks effectively. Mandy gives an overview of these three parameters in her Depth Perfection how-to and tells me she has a more in-depth camera basics how-to coming soon.

My camera and lens
I use a Canon 6D and regularly use my Canon 24-70mm L series zoom lens. It’s my go-to lens for versatility, and I love the range it gives me from up close and personal on a single item, to father away with more residual details included. I always shoot RAW images on full manual (meaning I control each of my settings, none are on automatic), and in my “kitchen studio,” my settings remain fairly constant since I always shoot at the same time of day.
My camera settings
ISO: ranges from 500-2500 (I try to keep it as close to 500 as possible since higher ISOs lead to graininess)
f-stop (controls aperture): ranges from 2.8 (the lowest my zoom lens will go) to about 3.2. If I want to keep the foreground and background more in focus, I pop the f-stop up to about 4-4.5. I have a Canon 50mm 1.4 lens that provides a much shallower depth of field (read: more blur), but I find that for my particular style, this doesn’t allow for as much detail to come through. I want depth, but I want the non-dominant items in the background and foreground to be recognizable. A 1.4 f-stop keeps only the subject in focus and everything else very blurred. For example, a milk bottle placed in the background would look like a blurry white rectangle and may not be recognizable as a milk bottle. This isn’t wrong, but isn’t a great fit for my style.
Shutter speed: Almost always 1/125. If I want to let more light in, I lower my shutter speed which keeps the shutter open longer. The tradeoff here is an increase in motion blur from shooting handheld. Any sprinkling of confectioners’ sugar, for example, would also be quite blurred. Motion blue from lower shutter speeds can largely be eliminated with the use of a tripod, so I break that out and set my camera up for maximum stability and focus.
Depending on the angle I’m shooting at, I alter my camera settings to ensure that I am letting the most light in.
Best practice: Keep that shutter speed and ISO on the lower side for max natural light exposure and crispness when shooting indoors. Keep your aperture wide by selecting a lower f-stop. This lets more light in and blurs the foreground and background.
Editing
Our final step in this four-step process is where the magic can really happen: post-production. I’m here to take some, if not all, of the stress out of editing for you by going through my process in Adobe Lightroom. You can absolutely lighten and brighten those images without sacrificing the richness and contrast that makes drool-worthy food photos.
I encourage everyone to get familiar with Lightroom by simply experimenting with the sliders for a while. There are plenty of quick YouTube videos to get you started in Lightroom if you are brand new to the program and Mandy even has her own, which I'll link to at the bottom. And many of you probably know this, but you do not need a subscription to use mobile lightroom! You can do basic editing for free, however, if you do spring for the monthly or yearly plan, it opens up all of the desktop tools on mobile version as well (along with allowing you to edit RAW photos - the free version limits you to jpegs).
Every photo you take is unique. Each Lightroom slider is a handy little tool, so don’t be afraid to slide them up and down, back and forth on each photo until you reach your desired brightness for each image. Because it’s always nice to have a starting point, here’s my approach to editing.
My approach
Since I tend to shoot on the darker side (read: underexpose), I primarily adjust the brightness of my images by playing with exposure, highlights, shadows, and whites. These sliders are all found under the "light" tab.
Exposure: The top bar under the “light” tab. Exposure controls the brightness of the entire photo. A little increase in exposure (read: even a tiny +0.25 increase in exposure) goes a long way to brightening your entire photo.
Highlights: I usually bring my highlights all the way down to ensure that the details in my food remain strong. You don’t have to bring them all the way down, but definitely decrease highlights to maximize details.
Whites: increase (slide right) to around 35
Shadows: increase (slide right) to around 75 (with some give or take depending on how bright the original image is).
Contrast: another tool in your arsenal to ensure that the depth remains, while the overall photo is bright and airy.

Next, I adjust the colors using the sliders in the "color" tab. For this photo, I shifted the temp into the bluer side of the Kelvin scale. Whether you like your photos cooler or warmer completely depends on your preference and brand aesthetic, so play around and see what your eye prefers. I also bumped the tint, vibrance, and saturation up a bit to bring out the yellows and greens. Like with exposure, small adjustments to these color sliders lead to big changes, so go easy on them or you'll end up with some atomic lemons!

Here's Mandy's video if you want to go more in depth about Lightroom basics. She walks you through her exact approach to editing, which is almost identical to mine!
Presets
Once you edit a photo to a look you like, you can save the slider positions as a preset that you can apply to future photos. Rarely will a preset be exactly right for future photos, but they’re a good starting point so you don’t have to start from scratch each time.
Final tweaks
When I have edited all of my images from a shoot, and they are all in a row, I swipe back and forth between images, making final minor edits to get them as close to the same brightness, warmth, and color as I can for this particular story.
Best practice: PRACTICE PRACTICE PRACTICE (pun intended). The more comfortable you are with the editing tools in Lightroom, the more confident you will be in your ability to deliver great photos each and every time.
The best thing about taking food photos: there is no mistake that cannot be undone. If you shot your decadent chocolate cake when the sun was too far gone yesterday (been there, done that), try again today. If you didn’t like the dish placement or the towel as a prop, remove it and take some new images. If the foreground was too blurry and you find yourself desiring more depth and detail, adjust your camera settings. If you don’t like the dark shadows on the side of that cookie, bring them up and then reassess.
You will grow by trial and error, so don’t be afraid to make mistakes! Dig deeper into your knowledge and vision. Try something new, or retry something old in a whole new light… just ensure that this new light is natural, strong, and bright. Your photos are sure to follow suit.
